Bulletin Board Questions and Answers (Back to the Beginning)

Here are the questions and answers we used on the bulletin boards. (The answers were on the page underneath, where they were revealed if the question page was lifted up.)

Q: How could dinosaurs fit on the ark?
A: First, the ark was very large. Second, dinosaurs, like crocodiles, grew their whole lives. When they were young, they were not so big.
Q: Are dinosaurs alive today?
A: No animals that we call dinosaurs today have been seen alive for a long time. But, many other animals like crocodiles and snakes are just like dinosaurs except they are not extinct.
Q: Can I ever be so bad that I can't go to heaven?
A: Nobody can be good enough to go to heaven. Anyone who wants to go to heaven has to let Jesus pay their way in. No sin is ever too great or too small that Jesus won't pay for it.
Q: Why do we have 7 days in a week?
A: God made the world in 6 days and rested on the 7th.
Q: Did Abraham get his promise?
A: Yes. There are many Jewish people alive today. They are all part of God's promise to Abraham. God's kingdom in the ends times will also be part of God's promise to Abraham. That's still going to happen in the future.
Q: When was the Galion Grace Brethren Church started?
A: Our church started as a Bible Study in 1958, called its first pastor around 1959, and bought land and started the building around 1960. [Obviously, you would adjust this one for your local church.]
Q: How could the death of Jesus, one man, pay for the sins of everyone?
A: Jesus is God, but he also became a human when he was born at Christmas. Since he is both God and man, he can pay for our sins forever by his death on the cross. The Bible says that since one man (Adam) brought us sin and death, one man (Jesus) can bring us righteousness and life.

Q: Where did Cain get his wife?
A: Adam and Eve had daughters as well as sons. Cain married one of his sisters. (We don't marry close relatives today because of inbreeding, but since Adam and Eve had the genes for the whole human race, that wasn't a problem until many generations later.)
Q: Why weren't Adam and Eve supposed to eat the fruit from the Tree of Knowledge?
A: God gave Adam and Eve a rule that they could break or not break. He wanted them to have the choice to obey or not to obey.
Q: When did it rain for the first time?
A: God told Noah to build the ark. It had never rained. When Noah finished the ark and all the animals and his family were on board, it rained for the first time ever.
Q: Did all the dinosaurs die before there were people?
A: No, Adam named the dinosaurs in the garden of Eden. We just don't know what he called them. Job called one Behemoth and another Laviathan. In the middle ages, they were called dragons, but as more and more years passed since they had become extinct, the stories of dragons became more and more exaggerated and fanciful. Later, when archaeologists started digging up old bones and putting them together, the word dinosaur was invented to describe this kind of animal.

Back to the Beginning Decorations

We designed these posters for the five lessons.
The fifth one is a little hard to see in this picture, so here's another shot of it.

At the back of our auditorium we have some interior windows. We like to create a paneled scene for them, because it looks nice behind the glass. This year the paneled scene consisted of pairs of animals headed, presumably, toward the ark (which I already posted photos of earlier).
In the hallway downstairs, we lined one wall with black paper to create a backdrop for Abraham, who is looking at the stars, illustrating the lesson on the Beginning of the Promise.
The main (elementary) bulletin board was conceptually simple this year, featuring the logo and theme title for the week and a set of simple questions related to the Bible lessons. (Lifting up the question pages reveals answers behind. I'm told a few of the kids even looked at them.)
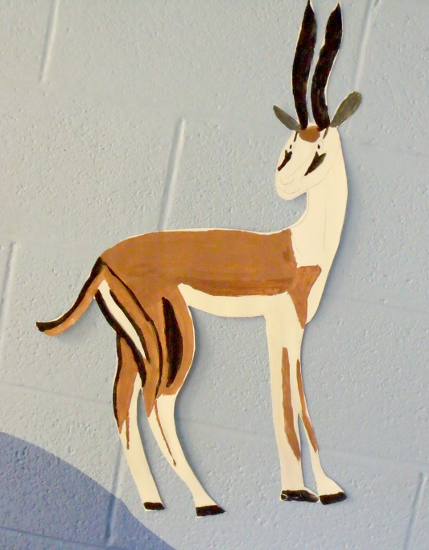
We did something very similar for the teen-room bulletin board, only with different questions. We also painted some animals for the teen room walls.


Incidentally, for those who don't know the trick, you create things like this by tracing line drawings (out of coloring books or off the internet) onto overhead transparencies, using wet erase markers. You then project the image up onto a bulletin board, thumbtack some posterboard up there, and trace the lines with pencil. The actual painting then is basic color-inside-the-lines stuff (using poster paints), which does not require very much artistic talent. (Not that it hurts, mind. If you look at that paneled scene above, you can tell that the birds were painted by someone with a bit of talent; whereas, I painted Mr. & Mrs. Triceratops. Nonetheless, all of them came out usable, even the one we let a first grader start.) After the paint dries, go over the lines with black marker.
In the preschool room, we hung stuffed animals from the ceiling (via fishing line).

That's the bulk of what we did this year. We also had some prefab decoration kits that we hung up, which people had purchased previously e.g. for Sunday School, but there's not much point showing you pictures of that. This is enough anyway, especially with the impressiveness of the aforementioned ark, which you too can build — see the plans, part one, and part two.

Ark Building Photos, Part 2

(Continued from part one. See also the plans.)


The following day we actually connected the fourteen sections to each other, using glue and a box-tape machine that one of the men in the church provided. (You can see the device in the first photo.)

We then assembled the roof from another dozen or so boxes. The second photo shows the roof folded lengthwise down the middle and laying flat on the ground, which is how we assembled it.
After affixing the roof to the assembled ark and straightening it out, we then applied the pitch. You could use a liquid pitch, but we opted for black paper (the kind that comes on a giant roll and is used e.g. for bulletin board backgrounds), because it was easier, and also because we needed to buy black paper for something else anyway. (I'll explain that when I upload photos of the other decorations.)
Where the open sections were (for people to look inside and see the animals and stuff), we cut slices of the roof to create flaps that could lift up, to allow more light into the interior of the upper deck, for better viewing. This would not be strictly necessary, but it also wasn't hard to do.
Here's an end-on view of the entire ark, essentially complete:
I've also included a view from the back end. Once we had finished the exterior of the ark...
The next step was to place the animals and whatnot in the interior. (The fences had already been hot-glued in place.) This photo shows an overview. As you can see, we had three of the fourteen sections open. We named these three sections A, B, and C, so that we could keep them straight while planning. (In the left on the photo, A is on the left and C is on the right.)

In the upper deck of section A we placed Noah, one of the dogs, armadillos, platypuses, wolverines, Tazmanian devils (which don't look a think like the cartoon one), a pair of very large snakes (I suppose they could be pythons), a lemur and a chipmunk (perched on the fence), an enormous grain bin (we used corn meal for the grain), bundles of straw, ankylosaurs, hippos, bears, eagles, two moose and two other deer. You can't see it from this angle, but in the very back there's a large archway (across from the moose pen) that opens onto a down ramp leading to the middle deck.
On the middle deck of section B we placed the tigers, walruses, a grain sack (actual contents: crumpled klenex), a pterosaur, one of Noah's sons, giraffes, flamingos, swans, zebras, and a stegosaur. Behind the stegosaur is a hole in the floor corresponding with the aforementioned ramp.
On the upper deck in section C we placed sloths, koalas, parrots, raccoons, echidnas, skunks, mongooses, ferrets, llamas, one of Noah's daughters-in-law, baboons, gorillas, antelopes and gazelles, and the horses. You can also see a pitchfork and shovel leaning against the back wall. We were going to put some food stocks in the right half of that back section, but we never quite got around to that.
On the middle deck in section A we placed donkeys, turtles (on the log and on the ground), camels, squirrels (on the fence), peacock and peahen, cats, the two largest rabbits in the history of the world, a feed box, two kinds of waterfowl, sheep and goats, and six head of cattle in the back. (The seventh cow is elsewhere, pulling a cart.) One of my regrets is that our cattle were not very representative. At least they weren't all holsteins (we had longhorns, shorthorns, a bison, ...), but there's nothing resembling any of the various Asian cattle (e.g., zebu), no old-world Bison, no yak, etc. In fact, they were pretty much all North American. Of course, the ones on the actual ark were presumably the ancestors of both Old-World and New-World cattle, and there are no surviving pictures of anything like that. Still, even though we couldn't be fully realistic, I'd have liked to have had a somewhat more representative sample.
Below, on the lower deck in section A, we placed Noah's extremely rotund wife (whose head is about three feet in diameter — you try finding human figures in period garb to the correct scale; at least her height was reasonably close to correct), the other dog, another sack of grain, pigs, a couple of exceptionally large lizards, chickens, ducks, the other chipmunk, rhinos, and the back section is filled with piles of hay. You can't see everything in this photo, due to the angle. The back end of the cart is visible at the bottom of the ramp.
In section B we built the ramp between the middle and lower decks. We placed pandas below the ramp, badgers and aardvarks directly behind it on the lower deck. Directly above them on the middle deck are dimetrodons, puffins, penguins, robins, and dodos, across from the hyenas and foxes. Behind them are cheetas, leopards, a hay rack with a lemur climbing on it, and the lion and lioness near the back (right in front of the ramp).
Below the cheetahs and leopards we placed one of Noah's sons, the capybaras (not visible in the photo), and a pair of fairly abstract animals that might've been supposed to represent alpacas, or possibly camels, we weren't sure. They looked like animals, so we stuck 'em in there. In the back we placed the triceratopses.
On the middle deck in section C we placed alligators, owls, a corn crib (which you'll be able to see better in another picture), ladder, and water barrel, chimps, orangutans, elk (which are probably the same thing as deer, but then again they're very likely clean, so we actually probably should've had 3 more, or one more if they're also the same as moose), ostriches, emus, and a pair of medium-sized dinosaurs (ornithopods). The lower deck in this section was not visible, because the entrance ramp was in front of it. Speaking of which...
We placed the elephants on the entrance ramp, so that they would be clearly visible when looking at the whole thing, to help provide a sense of scale.
For similar reasons, we also made up this sign, with a to-scale picture of a school bus. The text reads, A standard full-sized American school bus is 36-37 feet long. The ark was 45 feet high and 75 feet wide. Two busses could park end-to-end at the back of the ark and still not be as long as it is wide. A dozen busses could park end-to-end along the length of the ark.
Just in case that wasn't enough, we also made a scale model of our building. (The bricks are not to the correct scale, but the dimensions of the building are right.)
After placing nearly everything else, we decided that we wanted the cart to be further up the ramp, so we adjusted its position slightly and stuck it down with the sticky stuff college students use to put up posters.
We placed some birds along the window ledge. In this photo I've highlighted three doves and a blue jay.
Here's the promised better view of the corn crib.

Two By Two Race

Wednesday:
Bible Lesson: Sin brings a penalty; Jesus paid our penalty so that we can be saved. (Genesis 6-9)
Memory Verse: 1th Corinthians 15:22
Age Groups:
  • elementary
  • teens
Equipment Needed:
  • strips of cloth (to tie legs together)
Instructions:
Tie children together into pairs (as for a three-legged race), with the left child's right leg tied to the right child's left leg. Tell them that they have to run 2 by 2 to get to the ark (i.e., the finish line). Let different pairs of children race against one another. If there's time, you can even let them switch partners. When time runs out explain that the flood is over and the land is dry and let them get off the ark and go on to their next activity.

Bubbles (Preschool Game)

Tuesday: Bubbles
Bible Lesson: Adam and Eve sinned. We all sin. Sin is when we disobey God. (Genesis 3)
Age Groups:
  • preschool
Equipment Needed:
  • bubble stuff
  • bubble wands
Instructions:
You've got a dishpan or somesuch full of bubble stuff, and you have bubble wands, and you have preschoolers, and they blow bubbles, and they giggle, and the run after the bubbles, and try to catch the bubbles, and watch the bubbles pop, and then they blow more bubbles. Yay!

Board Foot Walk

Tuesday: Board Foot Walk
Bible Lesson: Humans are sinful and require salvation. (Genesis 3)
Memory Verse: Romans 3:22
Age Groups:
  • elementary
  • teens
Equipment Needed:
  • Boards with straps on them (see Preparation).
Preparation:
Prepare an even number of long boards (two-by-fours are good) by attaching straps to them in loops at evenly spaced intervals. Each loop should be large enough to accommodate a shoe, and they should be at the same position on each of the boards. We've found that 3-4 straps per board (and thus 3-4 people trying to work together) works pretty well. You will need two boards for each team that will be playing the game at any given time, so e.g. if you plan to have two teams going at once you will need four boards. Wide straps are best for the loops (rather than thin straps or rope), especially if some children might wear flimsy shoes or even flip-flops.
Instructions:
Each team gets two of the boards. Set them side-by-side, and each person puts a foot under one strap on each board, so that the team has essentially two very long feet.
Have them (attempt to) walk together as a cooperative group, from one end of the playing area to the other. Then have them try to turn around and walk back. Race the teams against one another.

Animal Game (Pretending)

Monday: Animal Game
Bible Lesson: God created the world and deserves our worship (Genesis 1).
Age Groups:
  • preschool
Instructions:
Pretend to be animals together. Let someone pretend to be Adam and guess what animal you are all acting like. Rotate through and let each child who wants a turn pretend to be Adam and guess. Play until time runs out.

Animal Match-Up Relay

Monday: Animal Match-Up Relay
Bible Lesson (elementary and teens): God created the world and deserves our worship. (Genesis 1, Acts 17)
Bible Lesson (preschool): Noah and the Big Flood
Memory Verse: Acts 17:24
Age Groups:
  • elementary
  • teens
  • preschool
Equipment Needed:
  • 3x5 cards
  • animal pictures (from the internet)
  • clear Contact (laminant)
Preparation:
Print pictures (from the internet) of male and female animals of various kinds. You need two male and two female of each animal. Try to get a mix of animals with obvious gender differences (e.g., peacock/peahen, bull/cow, lion/lioness, cardinals) and ones that look pretty similar (e.g., dog, elephant, horse, squirrel). Cut these out and glue them onto 3x5 (or 4x6) cards, and laminate the cards using the clear Contact.
If you use two colors of cards, you can make one whole deck (one male and one female of each kind of animal) on each color. Better yet, use four colors so each deck can have one color for male and the other color for female animals. (Color-coding the cards isn't necessary for playing the game, but it makes it easier for the game leader to get the decks sorted out between times.)
Instructions:
Divide into two teams. One deck of the cards is used for each team. Hand out the animal cards of one gender to the team members, and set out the cards of the other-gender animals at the far end of the lawn, face down. Each team member in turn runs the course carrying one card from the deck and selects one of the face-down cards at the end of the lawn. If it matches the card they are carrying, they get to keep the pair. If not, they must return the card to its face-down position and return with just the card they brought with them and tag the next team member. Play is finished when one team has all their matches. If enough time is available, you can play it again.
Variations:
For preschool, dispense with teams and the relay aspect: when you blow the whistle, they all run down, grab a card, run back, and match it up with one of the cards at the near end. Have them show a friend their matching pair of animals and name them (e.g., These are lions.). Repeat as necessary to fill available time.
To make the game more difficult (e.g., for teens), you can introduce obstacles for them to overcome, require them to run blindfolded or balancing a cup of water on their forehead, or anything else you feel would make it more "interesting" (i.e., more challenging).
If it's a bazillion degrees out, you can turn this into a water game simply by replacing the run-across-the-field portion with some kind of water-based obstacle or feature (sprinkler to run through, Slip-N-Slide to slide down, wading pool to splash through, etc.).

Ark Building Photos, Part 1

We started by collecting gopher cardboard — over 100 Wendy's fry boxes. This double stack is less than half of the total.


Here you can see one section being assembled.


Three of the sections will be open, i.e., people will be able to look inside and see the animals and stuff. For these three sections it was necessary to build decks, ramps, doorways, fences, and so on.

We started early on the three open sections, so we built them at home. For the rest, we held a workday. Would you believe we got the remaining eleven sections built in under four hours? It was amazing. We built them in the basement, then carried them upstairs to lay them out in the auditorium, where they will be assembled into the final product.


This is how it stands right now. The 14 sections aren't actually glued to each other yet, and we still need to make a roof, coat the whole thing with pitch (black paper), set up the animals inside, and so forth. We'll be working on it some more tomorrow.
As noted in the plans, the scale here is 1/24, i.e., one inch on the model represents two feet on the original. For example, our Noah figureine is three inches tall.
Continued in part 2.